")


OneDrive (work or school) OneDrive (home or personal) OneDrive for Windows
-
Select the Microsoft OneDrive cloud icon in the taskbar or menu bar.

Note: You might need to click the Show hidden icons arrow
 next to the notification area to see the OneDrive icon. If the icon doesn’t appear in the notification area, OneDrive might not be running. Select Start, type OneDrive in the search box, and then select OneDrive in the search results.
-
Select
 > Settings.

- In the Account tab, select Unlink this PC or Unlink this Mac. The OneDrive setup screen will appear; ignore it for now, but don’t close it.

-
Next, move your OneDrive for home or OneDrive for work or school folder. Using File Explorer or Mac Finder, drag the OneDrive folder to your preferred location.
Note: For more information, see Install OneDrive on an external drive.
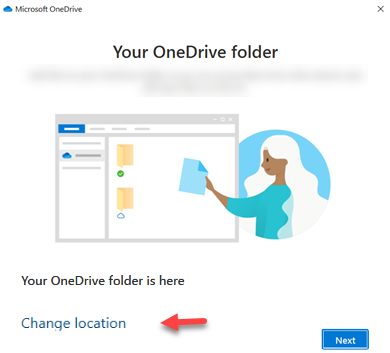
- Go back to the OneDrive setup screen, select Get started, and then follow the instructions until you get to the screen where you can change your OneDrive folder’s location. Select Change Location, choose the new folder location, and then select OK.

-
You’ll see a message letting you know that the OneDrive folder in the new location already has files in it. Select Use this location, and then finish setting up OneDrive.
- If you had chosen to sync only some folders before the reset, you’ll need to do that again once sync has completed. See Choose which OneDrive folders to sync to your computer for more information.
- You’ll need to complete this for your personal OneDrive and OneDrive for work or school.
- If you had chosen to sync only some folders before the reset, you’ll need to do that again once sync has completed. See Choose which OneDrive folders to sync to your computer for more information.